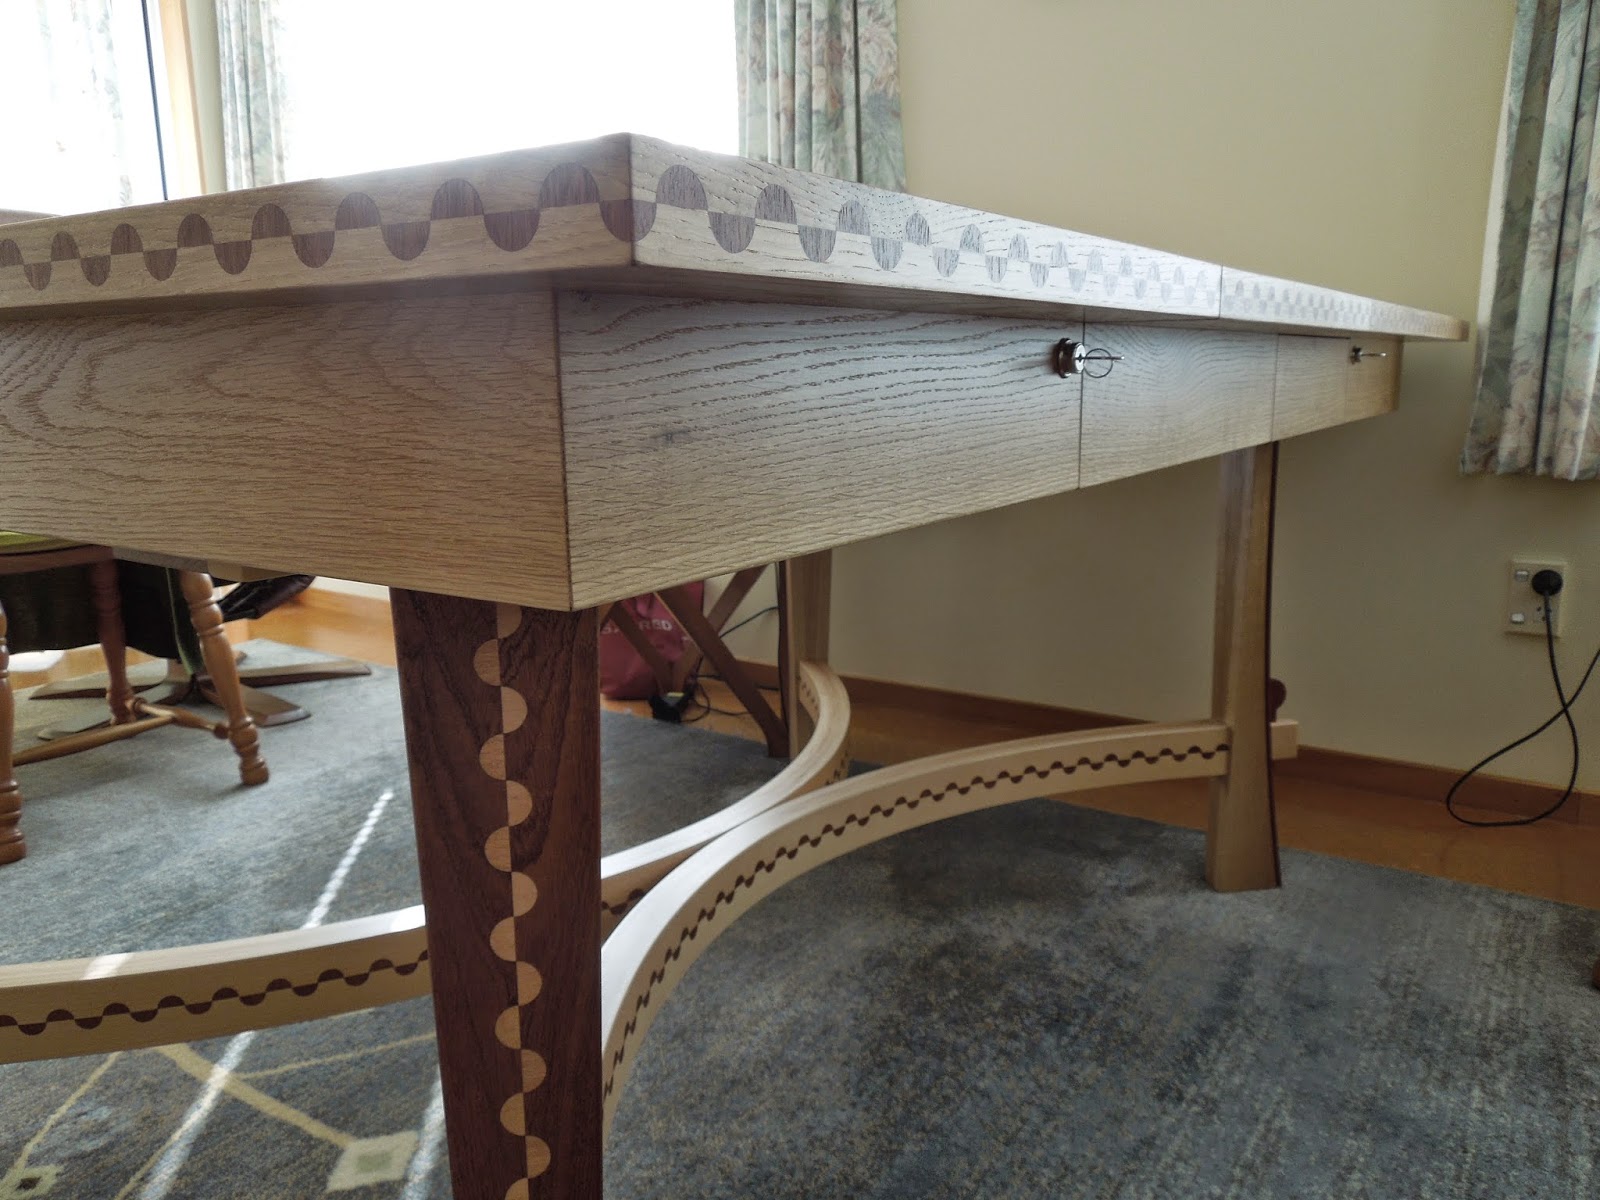
That was the aim, to have room for the toaster the marmalade the coffee and the newspaper, in this picture the table is open by one extension and that is the panel under the laptop.
The polisher had the table in bits for a week and when it came home I glued the 2 curved rails together in the middle and reassembled the rest, so should we ever need to move it it can be in bits within half an hour.
Here we see the table with one of the extensions being opened out, the leaves locate on the biscuit type lugs also note the apron piece with a biscuit for locating.
And some of the details, the keys have to stay in the locks unfortunately but as they are out of the way and mostly unseen who will know, the locks push in to lock the sliding leaves in both positions.
Now thoughts turn to chairs and a means to have them look like a set, and the possibility of it happening before the table gets old.

Thursday, May 15, 2014
Sunday, April 20, 2014
An Oak Table
A finished table, that is apart from being disassembled for the man to lacquer it and then the reassembly that will include gluing some of it together.
The picture here is of it at its smallest being 1500mm long and 1040mm wide, the middle section is a fixed item and the 2 end leaves slide apart for the butterfly wing extensions to fold out.
The 2 halves of the butterfly wing extension are hinged with a Soss type hinge and pivot on a aluminum tube, the apron pieces are hinged and the one that hangs down underneath is held up with a magnetic catch.
The runners for the sliding top are full extension and a bit heavier than normal but there is still movement / flex in the extension leaf when it is open, I would have liked it to have been less flex but I guess it is to be expected from moving parts.
There are two of these extensions so we have a choice of 3 table sizes the smallest as mentioned earlier being 1500mm then with one extension being 1870mm and when both butterfly wings are open 2240mm, we don't have 8 chairs but some may like to stand and admire.
Friday, February 7, 2014
In NZ
In New Zealand over this summer period we have a few days holidays, in past years I have spent more time on the local beaches but with a table top looking so good and the thought of machined timber stood there ready to be glued I had to get on with it, some of it was starting to have a mind of its own and taking on an unwanted shape.
In the photo I have 2 pieces of a bat wing extension in the vacuum bag, I am gluing on the backs, in the foreground there are the other 2 pieces ready to go in when the first 2 come out of the vac bag, it is warm here at the moment so the epoxy cures enough in about 4 hours, once these backs are on I will PVA the borders on using cramps as I have more control in getting tight joints, these panels were cut at 7mm X 73 wide and glued together in sets of 3 so I could still get them through my thicknesser then one more joint and I have a panel of 6 pieces X 6.3mm, these panels will be hinged together with 2 Soss type hinges.
These 3 panels will be the table without the bat wings, they have been through a drum sander so are now all a very consistent thickness of 24.3mm and with the backs glued on they should be around the 30mm size, they look a bit milky now probably a lot to do with the cross sanding and the light as I took the photo, I expect it to look different when sanded and some lacquer on them but do wonder if the contrast of the boards will be so obvious but then it is natural wood and would look too like plastic if it was perfect, and if I tell myself that then it is all good.
There is going to be an inlayed edging to these panels, it is still to be made so there is still plenty of excitement around the corner.
Thursday, January 30, 2014
SOME REWARDS
On 25 December I showed the coming together of an idea and I was pleased with the result, I said that the piece would be cut into 4mm pieces and glued to the curved pieces I showed in the last post, as you can see it has all happened and pleasing it is too, these are about 65mm high X 40mm thick and 1500mm around the curve, the arc is one I made up as the ends have to come into each leg of the table but they will also meet in the middle as shown in the picture so there is a straight section on each end.
I think they will remain loose of the table until the polishing is complete so the lacquer will be even in the point where they join then I will glue them together.
There is a mortice in each end of about 80mm and once they are fitted to the legs (about 20mm too long now) I will glue in a oak tenon that will protrude from the leg with a wedge to hold the leg, I see these being about 200mm from the floor, I don't like the idea of feet and shoes being put on them and the damage that will occur but then a table is to use and if damage occurs I will know its been used.
There is also progress with the table top, this is 3 pieces I have been fitting together as I glue on the boarders and once they are all at this stage I want to have them put through a drum sander the theory is they will all be the same thickness, then I can start on the back side.
Saturday, January 18, 2014
A big project
I managed to obtain a ply foam ply 20mm sheet to use for the top of this table project, as it is going to be oak and oak is heavy and I believe can be unstable I wanted to laminate the oak onto something stable and light, the foam core is a pva foam and seems to take all glues OK the ply is 3mm.
Here I show the 3 leaves of the table top as it will look at its smallest each piece is 500mm X 1040mm when finished so the table will be 1500mm X 1040mm the center piece will be fixed and the outer 2 will slide out to reveal 2 butterfly leaves that will fold out.
This picture shows each panel waiting for the boarders to be glued on, the oak panels are about 7mm thick and will be sanded down to about 6mm one day, each plank is 73.3mm wide and glued together with pva before being vacuumed bagged onto the ply panels with epoxy, the boarders will have to be glued and cramped one at a time.
Here I show the butterfly leaves in place I moved one to show the join that will have 2 Soss type hinges eventually and will pivot to allow them to fold away underneath, all the oak to date has been free and with cutting and machining I managed to avoid many defects though much has ended on the floor and in the rubbish I hope its good for the garden, I have enough to panel the backs that will again be vacuumed on after the fronts are complete and sanded, the edges of the top I hope will have a similar pattern as shown in the last post.
The leg shape is still being decided but will again probably involve some of the pattern shown in the last post so there is still some of that to be made.
Here I show the two curved pieces that will span the legs lower down about 200mm of the floor they will have a through tenon on each end and a wedge system, the piece gluing in the jig has formed the top to the pieces on the ground then the piece in the last post will be ripped into strips and glued onto each side of those curved pieces, but that is some way down the track as I need the base of the table made to determined where the legs will sit and the legs made so it will all happen in good time, and lots to look forward to.
Subscribe to:
Posts (Atom)