FURNITURE

My blog is of my creations, My furniture, using wood I have collected from here and there, occasionally buying some to make up the difference.
My design is often based around what I have available.
Comments welcome, thanks for your visit.

My Trade Mark

My Trade Mark
I'm into diamonds

Friday, December 31, 2021

Just for the Record

 I was asked to make a yarn bowl again, this one was a great success
so I set about making one with some embellishment to take to the market, the wood is totara but being a young tree it is pale so the embellishment has helped lift it to another level.

The colour I used is some tints I have for use in fiberglass gelcoat for this reason I have used a rattle tin to put a clear coat on it.

The texturing is done with a micro motor carver, I also used pyrogrophy for some of the patterns.


Spinning out of control to a finish

 And this is what happened in the end, I finished it with a gloss rattle can so it is all shinny which does not come through in the photo.

There was an exhibition happening as I finished it so it went up on the wall there.


Friday, November 12, 2021

Two years on

Past and present

 Its just over 2 years since I made a Saueracker shell and painted it yellow, last week I started to fulfill my promise to make another and a larger one, this one is 350mm across but in order to make this I had to start with a piece of wood 600mm across it also has to have a backing board glued to it, all in all it took me 3 days to prepare the wood before I could put it on the wood lathe, it was too big to turn it as I would normally so I had to turn the head of my lathe to the side, it is a heavy piece so I started at a slow speed until I became comfortable and had the piece balanced.


I first saw a picture of this on The Canadian Woodworkers web site I was thankful that Lisa Chemerika posted the instructions, this time I went back to TCWW site and the instructions were still available, even with instructions it is not all plain sailing, there is a lot of stopping the lathe and looking at what I had done, stopping the lathe with such a large heavy piece traveling at 600 rpm is also not easy I needed leather gloves when I went to hold the hand wheel on the back of the lathe that acts as the brake

The first action is to turn the eye that is in the center when that is done and sanded the whole piece is removed from the lathe the 350mm piece that becomes the shell is unscrewed and rotated about 40mm when it is returned to the lathe the second part is turned, there are 8 parts to be turned so each time the whole piece is removed the shell rotated before it is screwed back in place and returned to the lathe, there was 3 days of turning involved, my days are short but it was a slow process.


The wood I have used is Tawa a New Zealand native that is heavy easy to cut but very plane so I have started to process of embellishment which will become another post here.

I have the choice of using the outer crescent but at the moment I have no intention of using it. 

Sunday, September 26, 2021

Better than I saw

I was trawling through a wood turning web site and saw a very good idea


I instantly knew how to make them, then as I started I knew how to make them differently to what I had seen.

What I saw did not have the stalk at the top or the pear type look where the stalk comes from, what I saw was called a leaf I am thinking of mine as being an avocado cross pear.

What I like is that I can make quite a large piece from some smaller pieces and that it soaks up a lot of time that is constantly rewarding.

In order to put some strength in the stalk I have put 2 veneers on each side of the stripe each veneer is .6 of a mm thick and 2 together is 1.2mm you would need to enlarge the pictures to see them I guess.

I think there are a lot of possibilities in what I can do with that wavy line as you can see there is a left and a right hand curve in the photos, I do enjoy forming the dish area on the wood lathe as I like to get the big under cut around the edge, there is also a lot of hand work away from the lathe when I form the rounded edge, one of them has a square edge I think the rounded edge is much softer than the square edge.

The white pieces are Tawa with a swamp Matai stripe and lid the darker piece is Rimu with a stripe of Lancewood the lid is Elm burl, the overall size is about 300mm long, about 230mm wide, they all start off as 50mm rough sawn wood so are a little under that plus the lid so they must stand about 60mm high.

The swamp Matai used in those striped could be thousands of years old as it was buried under 3meters of river silt in a very wide valley where the river must have changed course many times over a very
long time, the Rimu would be quite old too, the Tawa was a wind fall.


Thursday, July 8, 2021

Rewarewa Rocking Chair Finished

 Funny how all the sanding and dust is so easily forgotten, how all the thoughts of is this or that correct, because I had so very little wood to play with and I had to go looking for more I at one point thought I may have to make it more 2 tone, as it is the back braces are laminated from rimu on both faces and tawa on the inside.

The rockers are laminated from rimu, tawa and rewarewa, I made the effort to position the laminates for the best effect, I am well pleased with the end result.

There are a few differences from the previous 2 chairs, the top of the back legs was kept thicker in the initial stage and now flow down from the head rest without interruption, the outer edge of the arm rest has a more swept up look that leads into a better scallop at the back of the arm rest, the seat was molded in a different way and has resulted in a more comfortable supportive feel, the piece of wood the seat came from was very thick so from the side view looks to be substantial at the front I had to remove wood from the underside and I was able to achieve a good looking roll where the side blends into the front.  the front legs were cut out of one piece of wood so there is no joint in the wood as there is in most of this style of chair.

Again the finish is Osmo oil, it has resulted in the rewarewa and the rimu looking very much the same colour and while the tawa is white it does not add the contrast that I thought it would, this is wood and there is always the unknown.


Saturday, June 26, 2021

Chair number 3

 I could say its finished but its not.

I still have some radius to put on the back braces and a lot of sanding to do then some finish to apply, this all looks possible in about another week.

The Rewarewa is prone to having cracks within the wood it must be what happens as it is drying, I was hoping that I was going to be able to work them out as I cut the wood away to form the shape there are also more worm holes than I would have likes but as it says on the tin this is wood, you could not get authentic worm holes in plastic.

Because the rough wood was thicker than normal I have been able to make this chair different to the previous 2 chairs, different does not mean better but it was good to have the extra thickness and experiment with what I could do.


 I am pleased I put some thought into the laminates of the rockers as I think they look very nice, the Osmo oil I will use to finish with will bring out the colours which will help with the contrast.

Due to a slight mistake the outside edge of the arm rest is high and to my eye it is nice, the mistake may be staying in the plans if there is going to be another chair one day.


No two chairs are alike either through mistake or through design trial and error this makes the whole building experience more enjoyable.


It is such a thrill to have got this far, now that it is all glued up and all of the joints have come together better than in the past I know this because it was easier to clean up the joints once the glue had dried, I also feel the effect of the investments I have made in new machinery as everything happens easier, quicker and with less noise.


Thursday, June 3, 2021

Another Rocking Chair

 This is the 3rd Rocking Chair made mostly of Rewarewa, By the time I gave a thought to photos I had already cut out the back legs, this is all the Rewarewa wood I have and some of it has woodworm in it that I am trying to avoid using.

I have a number of adjustments that I want to make while making this chair there are also some changes as to how I actually go about putting it together, all of this Rewarewa is thicker than the Rimu I had for the last chair so that is making a difference too, each chair is very unique even though they all look the same when finished.

The seat has been carved out using a very different method to the last 2 chairs  so that has been a learning experience and one that I like, we will have to wait and see if the sitting experience is any different.

The front legs are (according to instructions) made of 2 pieces of wood glued together but because I had a larger piece they will each be made of one piece.

I am already a few weeks into this build, I have lost a few days due to machinery that stopped working and a mistake that I made, it is now winter and we are having some cold mornings so its not the best time to be out in the garage, the afternoons also suddenly become cold, I feel that I rushed the first 2 chairs so now I think I can take a little longer or just as long as it takes I am not keeping a track of time on this chair so it is what it is.

The back braces were made for the last chair but I had a change of mind so these one were made ready and waiting for me to use, the wood on the front and back is Rimu with 2 lamination's inside of Tawa the contrast will be good and the rockers are the same.

Monday, April 26, 2021

16 Days and 4 Turnings

 That has all happened so very fast, I did not realise it is only 16 days since I finished the last rocking chair.

This piece of wood was given to me and I was told it is Matai, swamp Matai so its dark colour is due to it laying underground for a long time, there are a few cracks in the wood so I have been lucky that the wings have stayed intact, the size is 80mm high and from wing tip to wing tip it is 230mm wide so it is probably a bit high for its width.

The wood was a pleasure to turn apart from having to constantly glue up the cracks.

I then took the chainsaw to a big piece of kauri I had been given and out popped this, again there are a few splits or cracks and some worm holes but it is very nice kauri so I did not want to waste it, some of the growth rings are 1mm apart which means the tree grew 1mm in girth in that year, the wood as I was given it shows it is a long time since it was cut up so like the matai above it must be very old.

The diameter of the bowl is 190mm, the thickness of the block would have been about 95mm before I started to turn it and I consider this too high for a bowl of this diameter so I set up the bowl saver cutting device I have and took the lid out from inside the bowl, in this picture it shows just how the lid was before I cut it out so the knob on top of the lid was inside the bowl.

The lid and the bowl I consider to be 2 turnings as there is just as much work in making a lid as there is in making a bowl.

The finish on all these items is Osmo Oil, I find that with the high solids product I only need one coat of the oil.

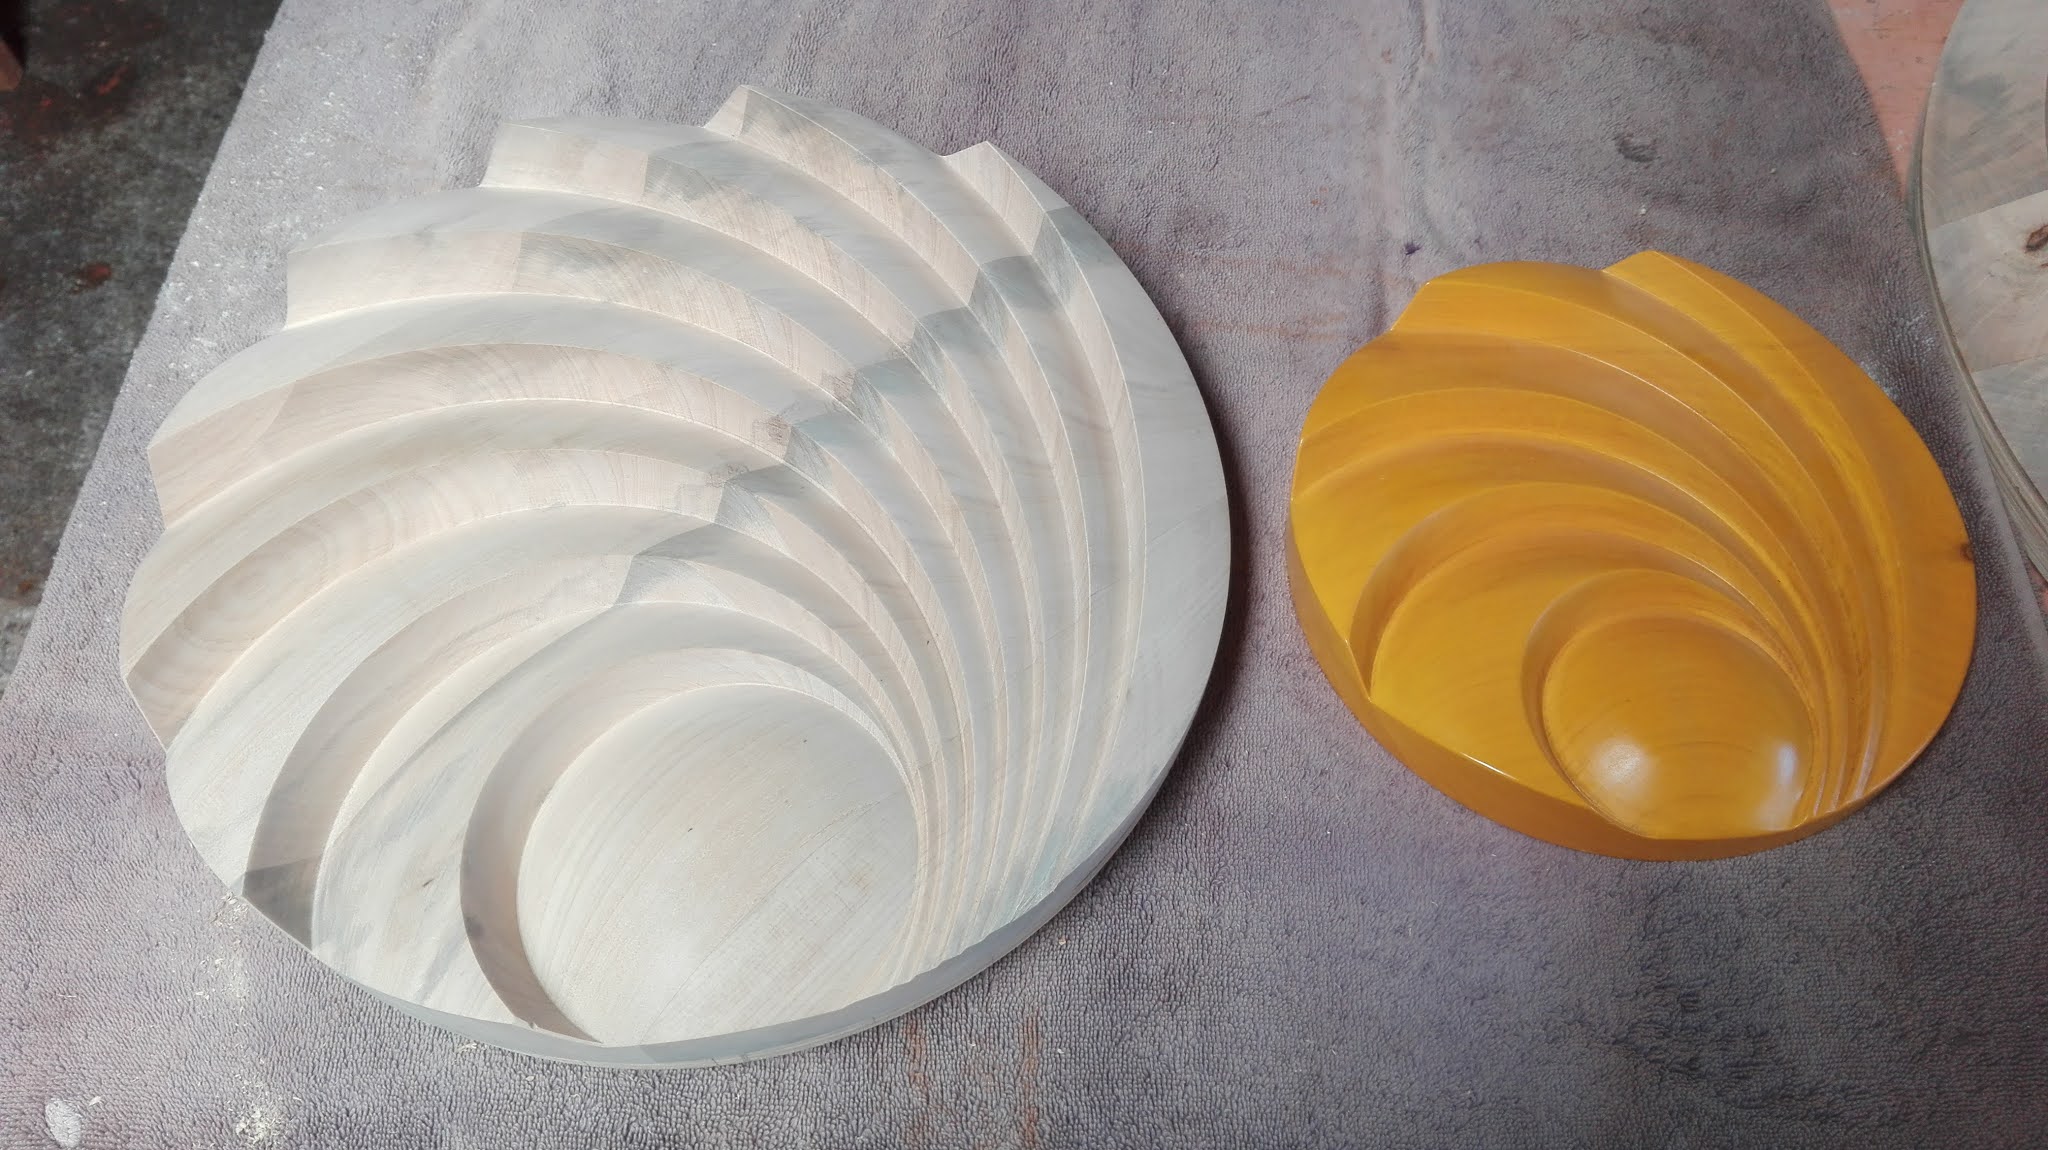
There was a piece of pohutukawa on the floor that I had been moving about each time I cleaned up I have no idea where it came from but it was very dry being dark in colour it is old wood or should I say its from an old tree and as a difference from the pieces above there was no cracks or splits making this piece of turning a pleasure to work with.

Its size is 245mm from wing tip to wing tip and 65mm high, making bowls with wings involves a lot of hand work and most of it is sanding, finishing with a 400 grit sandpaper.

This piece of turning is not square, the original block of wood was not square so after the initial turning and cutting off the unwanted wings I trimmed it keeping it out of square.

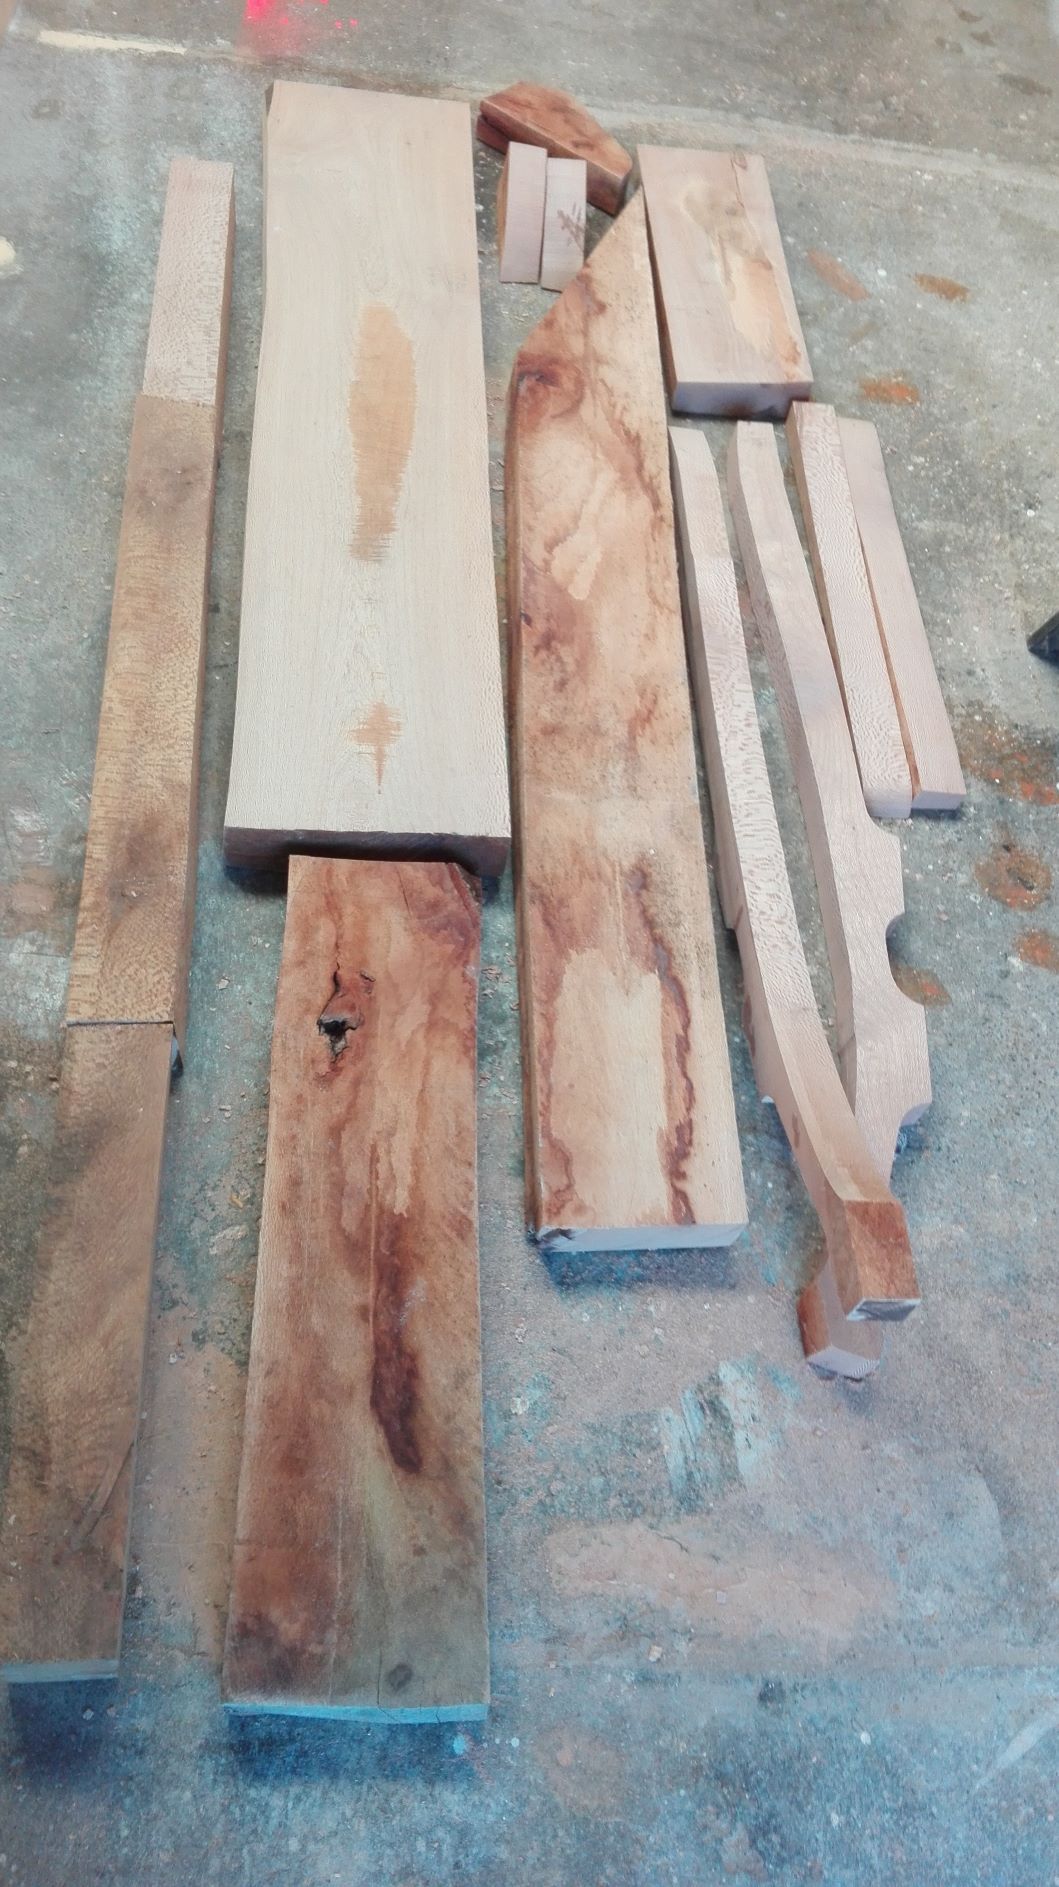
I am very fortunate to have such wonderful wood to play with.


Sunday, April 11, 2021

All Native Chair Finished

 I have finished the second chair and I am well pleased that I have done what I set out to do.

I have changed the joint at the back of the arm rest into the back leg with what I think is a more attractive and stronger joint I also kept it more square which I think blends better with the back legs.

At the top of the back legs I have made a softer looking radius that is in keeping with the radius on the inside.

The back braces are made of Tawa so are a stronger wood than the previous chair this made me more comfortable shaping the top of the back braces as per the instructions, the  shape lends a whole new look and being in a contrasting wood just adds to the beauty, I also managed to coordinate some of the spalting in the Tawa into a pattern looking from the back of the chair.

The rockers are also spalted Tawa with a single lamination of Matai, so we have three native woods Rimu, Tawa and Matai.

I started with a board of 50mm Rimu that the legs, seat and head rest came from this has given me a seat that is thinner than I would have liked, I also made a slight upwards roll on the front edge so that looking from the front the seat has a very fine look.

The arms and front legs have been recycled from an old house that at some time had been on fire I know this because some of the wood had charcoal on the outside and there is still evidence of nail holes that I could not eliminate altogether.

The finish is Osmo Oil.


Saturday, March 27, 2021

Second Part, Chair Two

The first chair is very good for a first effort however I always said that I would make more.

The first photo I took
 I had just been given a very nice plank of Rimu be it very sun damaged on one side so it became a chair of NZ native woods, the back braces and rockers will be Tawa and the rockers will have a stripe of Matai in the lamination's.

Due to the sun damage of the plank of Rimu I decided the construction would be different to the instructions in fact there are now a few differences, the Rimu is a very different wood to work with than the Macrocarpa of the first chair.

When I started the first chair there was a lot of time spent making jigs and molds, as I started this chair I had forgotten what I had done so it was in some ways like starting all over again, I was so engrossed in what I was doing I forgot to take photos.


 This joint on the back end of the arm rest is probably the most visual difference I have made, the original instructions were for a butt joint with a long screw I think this is more in keeping with the theme of the chair, as there is very little wood left on either side of the tongue I have also put a dowel inside the joint.


 At this point the chair is loosely sat on the rockers and there are still packers to go between the leg ends and the rockers.

After this photo was taken I spent 4 days grinding and sanding, now I am looking at making a slight alteration to the seat front before I sand that area I then have to turn my attention to the rockers and on mounting them to the legs before I start the sanding again.

Wednesday, February 24, 2021

First Part Finished

 The first chair is finished, I am so pleased with the final result, as promised by the designer Hal Taylor it is very comfortable to sit in, the lumber support is the best I have ever experienced the braces at the back are free to move and are  flexible so will contour to suit whoever sits in the chair.

The wood I used was a park bench in its last life so had been outside for a long time this left it very damaged so it has been a challenge to work around all the defects some found there way into the finished chair just to add   character.

It is booked to appear in two exhibitions over the next few months until then I will have it to refer to as I start on a second chair, again due to the wood I have available there are going to be some changes but I hope the end result will be the same.


Saturday, January 16, 2021

New Project

 I have been gathering wood and wondering what to do with it, the wood turning I do is too hard to sell not that a rocking chair is going to be easy however at the moment there is no intention to sell I would like one in the house, this chair is made from macrocarpa and in a previous life it was a park bench and had become very weathered, dirty with lots of splits and cracks so what I can rescue is is only a small part, this type of chair creates a lot of waste wood and is better suited to a harder type of wood however for a first time following some instructions it is a good exerciser before I get into a higher valued timber.

This is a take off of the Sam Maloof chair that was first made in the 1950s, then Hal Taylor took Sams look and developed it over a long time before making plans available for sale, so it is Hal Taylor drawing that I have bought and am following.


The plans lay it all out in detail, made for those with less experience, it is still a challenge and a good one to work through, the top picture is taken with the back braces just stood in place, the legs are just pushed into the joint and the whole thing is just sat on the rockers, it still needs some packers making that lifts the chair higher and are positioned on the bottom of the legs, there are also arm rests that need making and are quite a feature of the finished chair, all the corners have a big radius on them so the look is very slender and different to what is seen here.

Friday, January 1, 2021

The benefits of back ache

 I had done a few stretches but had not been for my morning walk then I went out and started painting a window it was too low and I was bent over trying to control the brush, by the time I came in I had back ache, in the possess of changing my shorts I bent over and the ache became something more serious, I knew I was in for a few days of pill popping and laying on the floor to get the muscle spasms to settle down, new years eve and I am in bed early unable to stand up any longer.

January 1st and it seems a good idea to sit and not do anything that puts too much strain on the back, I did manage a short walk.

This bowl has been saying colour me in ever since I made it, there were some muddy looking areas in the grain that needed to be hidden, ever since I bought my pyrogrophy machine I had wanted to try and bring some scales into the center of a bowl in an organized way, I had also promised myself I would try doing color over the osmo oil, today in the process I had to try do the burning over the color.

In my eyes, today, it is just the best, and on a day spent trying to do very little but recover I am particularly pleased with myself we will see what the people at the market say.