FURNITURE

My blog is of my creations, My furniture, using wood I have collected from here and there, occasionally buying some to make up the difference.
My design is often based around what I have available.
Comments welcome, thanks for your visit.

My Trade Mark

My Trade Mark
I'm into diamonds

Friday, December 25, 2015

My Cmas present

The Christmas present to myself is a completed carport roof, and thanks to my supplier it did happen before the 25th, I did not expect they would be able to get the roofing delivered at this time of year and felt cheeky asking but was told it would be there in store on the 23rd mid day and having my sons help we had 2/3 fixed on by the end of the day leaving me to fix the 2 clear sheets and 3 sheets of tin on the 24th next year I will need to get some cappings for the ends and think about how to close in some of the side.
By having the clear lite over the garage window I now get more
light on to the work bench in the garage that has been much needed.
I think I was snapped doing a celebratory dance and the other one was laughing at me as he is unaccustomed to seeing me dance or was it my fancy dress?
I would have liked more head room, I did manage to lift the high side about 70mm, I didn't want an internal gutter or to have the side too open so without lifting the garage roof this is what we have to have.
Rather than put a 75mm X 45mm over the top of the rafters I have put 140mm X 45mm between them these came from the old roof and are still good timber by doing it this way I have gained 45mm more head room and while that is not much in this case every little helps and I was able to use the timber that we pulled out of the old construction and at the same time cut out a lot of the bad parts.
The view from the kitchen window is now much more pleasing.
Have a enjoyable Cmas, and best wishes for 2016.

Wednesday, December 23, 2015

Carport roof

It was a dirty rotten mess that has been added to over many years much of it using second hand materials, the roof had holes in it and leaked I had covered it up with tin from the garage when I roofed that and it still leaked it was a sore sight from our kitchen window.
I have lifted the high side of the roof as much as I could and the low side is the same as much as I would have liked it higher, the steel posts at the front part are still good and strong and one post at the back there is an area that I will fill in and as I write this I think steel posts may be an option, for the side I am thinking I will use the tin that came from the garage roof and house roof there is a few good sheets and I will only go two thirds high and leave the top open on the front area, there is new tin coming for the roof today and it will have 2 sheets of clear plastic towards the back that will let some light into the garage window.
The steel post that were set in concrete many years ago are not in line and look as if they moved as the concrete was poured I have tried to pull the top of the post straight so the beam looks right, there will be no gutter as the ground is so porous the rain off the garage just soaks away and we hope it soaks towards the vege garden the passion fruit is too far away to feel the effect but as can be seen is doing very nicely with the water we give it, some are not as green as they were but eating days are a way off yet, we are getting a strawberry each most days and I have had 2 tomatoes the courgettes have been a bumper harvest to many to eat and there is a lot of pumpkin swelling up out there.  

Friday, December 18, 2015

Red better than Blue

We have changed the blue curtain for red ones that slide so nicely, the blue one is neatly folded away ready for the next mission, the lounge is finished and a pleasure to use, the carpet will one day be a pale grey or something, I still have some painting to do outside around the new door, the wall with the portrait needs painting and there is some skirting missing, why dose this sound like its not finished another job not finished, but then more finished than it was before and clean and usable for the day I intend to have off on Cmas day.

My son looked as if he wanted a project I only had scraps of jobs to do we are having fine warm weather and the carport looks ugly and dirty the roof is rotten and leaks some of the wood is rotten it has been a good carport and it could be better, we started late in the day but by the end of the second day it has all gone into a pile on the lawn and the side of the garage has 3 new sheets of ply on it, I am told I can have new roofing iron in 5 days time that I hope is about all I need to get some new woodwork up to fix the new iron to,
5 days and that will be just before everything closes for the Cmas holidays so here is hoping it is sitting here waiting for me and that I am not sitting here waiting for it to arrive, looking at how the carport has been constructed tells me it has grown over the years until it is as long as the garage the back portion being used as a wood shed for the house fire, the ground around here is very soft and porous allowing water to soak away very quickly and the idea of the pebble path is that we won't have any gutter to the roof.
It is very nice having a helping hand. 

Wednesday, December 9, 2015

The good the bad and the beautiful


 Two look alike windows now grace the front of the house leaving only the far corner one to change. 
When the old sliding door was installed someone put a strip of particle board under it, over the last few years it had been wet and fallen apart I decides to take out a few floorboards and put a piece of tanalised ply down that went under the new door and would one day have tiles on top of it, the sub floor timber is rimu and can be very hard the nail gun often has difficulty driving a nail into such hard wood and will rebound off the timber as the nail refuses to go in, I am very aware of this but with a moments lack of attention I had my finger behind the nail gun and as it rebounded my finger was trapped on the next timber joist the blood was instant as the finger end split and the colour of strawberry and the nail is now the colour of the background and looking bad.
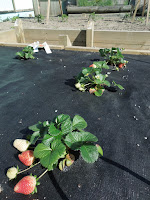
The strawberry's are today's crop and while its not desert for 3 it is one each and beautifully tasty they are, the passion fruit and tomato's have a bigger crop but are a while from being ready. 
Inside those windows I have been busy fixing new gib board mudding the joints, fixing coving, sealing the gib and hopefully will start with some paint tomorrow we have been living with most of the lounge curtained off to stop the spread of dust and I am aiming to have the lounge livable for Christmas and a few days break from my 9 to 5 working days. 

Tuesday, December 1, 2015

In the kitchen


Whilst waiting for windows to be made I attacked the bedroom ceiling and that was easy now I am so familiar with what to expect and how to go about it, then I had time to consider what will happen to kitchen cupboard doors, I have had a large sheet of blonded oak ply for a long time and thought it would be nice as a panel in kitchen doors, I had gained all this rimu, nice old well dried rimu with plenty of colour it is mostly 100mm X 75mm and nail holes about every 450mm the nails have been cut off and are still in the wood about half way through, so my quandary was will the two look right together and making a sample door was on the cards, the space above the fridge needed filling the ceiling needed sorting before I can proceed with the kitchen ceiling, I figured I had time to build the cupboard
and make the doors before the windows arrived, the blonded oak ply is  only 2mm thick and had to be glued to a thicker ply I chose 3mm so the doors are light weight given that the rimu is a heavy wood, I chose the round top rail for some relief from the squareness the doors are 22mm thick enabling me to have 2 biscuits in each corner creating I hope a strong joint.
I would like to have them sprayed with a lacquer but in the photo it is bare wood, you will need to look closely to see the grain in the oak as the photos do not do it justice.
 

Saturday, November 21, 2015

Much of the same, progress.

I was going to take photos of all the rubbish I had collected and was destined for the rubbish dump the carport had gib board and ceiling fibrous plaster stacked along the side and bags of old insulation making it difficult to get a car in the unfinished path at the right was piled up with old timber.
I borrowed a trailer from the lady who likes to take the old wood for her fire and did a run to the tip with the stuff in the carport then loaded the wood onto her trailer it was then I thought of a photo, it was then when it decided to rain and she arrived to take the trailer away, but look how tidy it is now, don't look deep into the carport
it is all wood that I may need one day.
The deck is also looking well dressed with covers on the 2 chairs I made, I have used cable ties to pull the covers tight as the rope that was provided was useless at getting any tension in the fabric.
With all the sun and now a few days rain the garden is growing well with a steady supply of lettuce and the odd strawberry there are courgette almost ready and more to follow a few tomatoes and probably more I don't see, the best part is the abundance of  flowers on the passion fruit and judging by the fruit already formed we are in for some tasty treats so it is best not to complain about our wet spell as this fruit likes its water.
The rubbish I took to the tip was from the corner bedroom it had been the store room, an unused bed, unopened boxes, or things that we just don't need, it is a place to dump stuff as I deal with other rooms but as the ceilings I have replaced are so nice I was itching to get on and do this one too (I am waiting for a window and door for the lounge the two closest in the photo) then I will want to replace that window too as it is the one with the strange looking narrow panel of glass the new one will have a large glass panel and one opening sash then the front of the house will be complete.
I think I can see the end of this whole house upgrade but then I can also see a lot that needs to be done before I get to that stage so maybe its just a feeling of confidence that in a year I have come this far and in another year I think it will be looking a whole lot more finished.


Saturday, October 17, 2015

A very productive week

Its Saturday and all the gib board is up in the lounge, one piece is 4m long and will probably be the longest piece in the house there were 2 pieces that could have been almost 6m but I opted to join them and the pieces of batten you see screwed to the ceiling are there to create a hollow for the plasterer and will be removed once the glue has dried, it is so good to have done this as it was a dirty job and have still got the itches from dealing with the fiberglass batts as its the older one that has more itch than the newer batts.

I have decided to employ a professional plasterer as I think a lounge ceiling needs to be well done then its time to get on with a new window and sliding door so I can complete those walls and do the coveing.
I was able to celebrate the ceiling with fresh strawberry from the garden well I have had 2 of them but if I can keep the birds off them there are more to come and if you look closely there are tomatoes growing behind that if I keep watering them should produce, we are having dry weather and most days are warm and sunny so some of the solar water heating tubes have been turned around so we don't produce more hot water than we need and have to waste it.      

Tuesday, October 13, 2015

Another milestone

Ho how I have been longing to do this, I have looked at this awful ceiling
everyday and wondered how soon I could rip it down.
Now that it is gone I can see what was causing the sag, I had thought it was water damage from the roof leaking and whilst that had done its share of damage the sag was caused by sloppy workmanship, in 1984 the house had 2 extensions put on the back which changed the roof shape a very large wooden beam was put in the roof space to hold up the ceiling as some walls were removed, that beam was never put in the correct place it was not sat on the outer bearing wall but on a ceiling joist and for some strange reason pieces of wood were pushing the ceiling down off the roof, some timbers that had been cut to get the beam in were never nailed to the beam and were floating around loose, there is also a short piece of timber missing from the
roof structure by where the solar water unit sits so I will remedy this problem, all the other problems are now sorted and in the second photo you will see one piece of Rondo ceiling batten in place.
Some time prior to the 1984 alterations the ceiling was insulated with Insulfluff or mashed up newspapers that is blown in on an hit and miss basis that has now all gone along with the old fibrous plaster now I have a pile of pink batts and some of the newer white insulation to put back up once the new battens are in place before the new gib board is fixed.
Our living area is suddenly very small we are hidden behind that blue curtain that is doing a wonderful job of keeping the dust contained. 
I should have a third picture of strawberry or should I say the one the birds got but its dark now and raining, there are lots of green strawberry and some old net curtains are going to come in useful soon.  

Sunday, October 4, 2015

A Rush of Enthusiasm

I think it had been brewing for a while, I had to keep moving that huge heavy slab of wood and it took up space in the carport now with the new roof it seemed time to extend the rail between the legs on the little table and fill up the deck, the power planer, 100mm sander and grinder got a good work out cleaning up the top and with it out on the lawn the next time I cut the grass all the mess will be gone, I am thinking the finish is temporary I will see how it weathers with nothing on it and if next year it needs doing again I will re think it then, the slab is 60mm thick so it is viable to give it a sand each year ready for the summer.
If you look closely you will see some of the eaves have been replaced and the rest of it will happen very soon, I removed the old eaves from by the toilet pipe as it was poorly fitted and had been painted so many times it was never going to look good under new paint.
Now I am looking at the decking and wondering where to go with that, a good water blast then decide whether to replace a few boards or to wait till I replace the whole deck.
I am trying to prepare myself for removing the lounge ceiling it would be nice to see it done and out of the way this year, it looks like a big job but having done the bedroom and finding it was not too difficult I can see a week will see it down and back up with just the surrounding areas to contend with next year and that will be a new project.    

Thursday, October 1, 2015

Summer ready

I opted for an oil stain on the cedar, the directions on the tin said overnight drying and two coats needed, well overnight the oil soaks into the timber but is not dry with the timber then saturated the second coat is still wet the next day and that is the ho so porous cedar the more dense pine probably needs a week to dry so I decided to get the white painting done and get it all in place where it can dry with plenty of air around it and I will come back one day and give it all another coat of oil.
I think our winter has been dry, we have had rain but I think our spring could be wetter and warmer so I wanted this roof up and doing its job, I think we will get a little rain in the back as there is a gap due to the curve but both the door to the kitchen and the bedroom door will get a lot of shelter so can be left open it it rains.
As with most projects I start it is not complete, there are still eves to sort out and I am looking at the electrical wiring I can see and thinking do I need to get to any of this and if I do now is the time to do it.
The table on the deck is small as the other house had a small deck, I have a large slab of macrocarpa timber its about 2.1m long 1.3m wide and 60mm thick and am thinking of swapping table tops I will use the current legs but make them wider to accommodate the longer top, some day those steps and deck are going to get a make over.

Monday, September 28, 2015

Projects end and start

I have been wanting to make one of the round corners for the skirting and the hall way was my opportunity, I started by gluing a few 20mm pieces together to form a block as a way to give it strength then used a hole saw to cut the internal radius then used the drop saw set on the 45 deg to cut the outer faces with the bench saw set to 10mm I cut the inside faces the outer radius was achieved on a disc sander it then had to be fit to the shop bought skirting and that was the difficult part, the corner has a long leg on it so it was not such a small piece to handle and the shape on the top was put on by hand with a lot of sanding, I had painted the walls first so it was all done very gently then pushed into place on some glue and a final touch of paint, I think I have 7 of these to do and now I have done one I don't want to do any more????
I finally had a window delivered and could get on with laminating the jamb I had to do it in 2 pressings as the long side of the window is 2560mm and my vac bag sheet is 2.4m so it went corner to corner and just fit, I have used a .8mm plastic laminate with a dotty type pattern its nice its easy to clean and no painting required I used biscuits in the corners with epoxy.
It was good to be putting paint on the walls and fixing the wardrobe permanently in place, the totara draws I made so many years ago seemed to be perfect for the space in the middle, then some curtains  and all that remains is the bed needs making, we would like to see more of the wood floor but the carpet is warmer when getting in and out of bed and we see enough to know that it is all real wood.
My mind had been on the outside the roof over the back door it also extends over the ranch slider to the bedroom so on those warm nights we are able to leave the door open and if it rains, well it can, the cedar beam I showed a few posts back I cut into 4 pieces and are fixed to the facing below the gutters I have strengthened the area behind the facing as the wind could do damage lifting this, in the photo the whole roof is in the garage on the floor having the corrugated polycarbonate sheeting fixed and cut to length, since this photo it has been disassembled for painting before it is reassembled in place, I didn't have a firm plan when I started this just an end picture in my head so the details have grown as I have gone along and that I can tell at the moment I am pleased with the look, it has
involved more in the painting, the pieces that are not exposed to the weather are being oiled and will show the grain the pieces that will get the sun and rain are to be white to avoid any heat absorption, its the heat that makes the timber move and the paint to crack then the water gets in, this nice rolled purling end is designed to shed the rain so it won't travel back along it and onto the oiled cedar.
I will endevour to show pictures from underneath when it is in place.

Wednesday, August 26, 2015

Two weeks ago

Two weeks ago I got out of bed and pulled all the ceiling in the hallway down, I took the rubbish to the tip then bought some Rondo steel ceiling batten, by the end of the day it was all battened out and 2 pieces of gib board in place, the next day I framed out the new roof access hatch and completed the gib boarding, I stopped the ceiling and sanded before I started to do the coving, it took 2 days to fix all the coving, then its been the slow process of painting and going back to stopping when I thought I could see irregularity in my stopping, all the walls have been replaced in this part of the house so apart from my stopping not being to a professional standard but I think its very good all the gib board is new so the paint job is good and that has been the goal and I am so pleased it has come out so well.
These last few days I have been fixing architraves to the door frames and then decided I would put thresholds in 2 of the door frames to the hot water cupboard and the laundry as there is a wooden floor in both rooms, I should have put the threshold in before the frame went in but it will be put down to experience of lack of it, now I wanted to get a perfect fit of the threshold around the door frame and the architrave that is on one side, to do this I taped around the area then cut an m d f pattern roughly allowing about a 5mm gap that I filled with builders bog that is a quick setting filler that will stick to the mdf but not the plastic tape when the filler was well set I pulled out my pattern its a perfect copy of what is there, I had glued up some old oak flooring to make the threshold from, I cramped the pattern to the oak and used a copy cutter in a router to copy my pattern and I have a
perfect fit now I can get all the architraves on.
I came across a curved cedar beam 4.6m long 90mm thick and 250mm deep, cut in half length wise and I will have what you see here, this a a pattern cut roughly to see how it would fit, I think it will be a little lower than this so I can get a fixing into the fascia I will beef up the wood behind the fascia and use bolted steel brackets, I have also experimented and managed to cut one half of the beam in half length wise so I will have 4 at 40mm thick that gives me 4 beams at 800mm spacings over this area, I now need to
find a corrugated plastic sheet that will bend over this curve.
There are the curved beams hidden and I can't wait to get at then and see what becomes of them. 
I was offered some old wood and could not resist it, there was far more than what I show here as I have started putting it away we need the carport for the car, there are about 6 long lengths of hart rimu 100mm X 75mm that was removed from under a house when it was lifted 30 years ago there are nails every 400mm and lots of shakes, I am thinking kitchen cupboard doors I need 11 of them and some draw fronts there will be a lot of rubbish from it?
What is shown here are long lengths of oregon again about 100 X 75 I now realise it has some wood worm and I don't know how much is affected, is an oregon parquet floor too much in the kitchen with rimu doors that is what is going around in my head, in this pile are also some big pieces of douglas fir that may yet get used for that roof they will look good with that cedar.       

Saturday, August 8, 2015

Getting fancy

My high light is being able to use the inlays I created so long ago, I also like to take a bit of time to create something a bit special in each area of the house I deal with, this came about partly from what I had done in the previous house, partly from what I was left with after removing the fireplace then some thought about what material I had available as I threw so much away when I made the move to this house, the block at the bottom is made of 5 pieces of wood the piece above is made of 12 pieces and I am not going to count the pieces in the post, the bottom block is repeated at the top.
The bare wood panel and cleat behind the post will eventually be painted the same colour as the walls, the only clear finished wood will be the floor the posts and the pine front edge of the shelves which I hope will make the post prominent, under the two lower shelves will be a hanging rail so each side will be a his and hers and in the center area will be a chest of draws I made some time ago that will fill that space.
I have a little more to do fitting these shelves then it will all be taken out and into the garage for painting to an almost complete stage and during that time I hope to install the window and gib board that wall then I am able to paint the whole room and another coat on the floor.   

Tuesday, August 4, 2015

Mud

I am waiting for a window so can't work on that wall, I have the other walls gibed and taped with the first coat of stopping, I will get the final stopping on the walls before I put any gib cove up around the ceiling, I have used a metal corner to the internal corners and fiberglass tape to the joints, I have put the old underlay on the floor to protect it from damage now I have to remember not to drop tools as I finish with them.
This is where the new wardrobe will be, I have pre-fitted some timber to take the top shelf and 2 vertical divider boards but will now get the wall painted and cove in place, there is a small block on the floor where one of the posts will be and this will be repeated at the top but with a smaller block and the inlayed post between them, I have the ply for some of the shelving cut and in the process of being painted in the workshop / garage and will progress with that while I finish the stopping and first coats of paint.
I will pre-finish all these posts before I install them and they will be in bits so I can get them between the floor and ceiling without damage I hope.   
 

Sunday, August 2, 2015

A floor a door and fancy bits

A lifetime ambition has been to use a floor sander, it finally happened, they said it was easy to grind holes in the floor but I thought I had done well and achieved a good finish that was till I put the polyurethane on it, now I think it looks better than it did before it was sanded I think in this photo it has had one coat of polyurethane and is a bit furry due to using a cheap roller, I put in 2 hours of hand sanding and after the second coat it is so much better I did use a better roller the second time, most of the floor will be covered with either bed, rugs or furniture so the hollows I created
will mostly be covered up, I like the look of the door threshold as a break between floor and carpet it also covers up many nail holes from carpet being fitted, I had the door frame pre painted with 2 undercoats and the door is totally finished so it was just an hour and a half to get it fixed in place with knobs on I now need another rare earth magnet so I don't need to drill big holes in the door.
I came across a large curved cedar beam on our local auction web site and won the auction so today we drove down country to pick it up, at over 4 and a half meters long its as long as the car but being cedar it is light to carry, I have half a plan to use it over the back door to give us some rain protection as we step outside.
The inlayed post I showed 2 posts ago have had some attention and now have feet and hats, there will be 2 posts as part of the wardrobe and each post will have one of these at the top and one at the bottom, these blocks are about 90mm wide and 60mm deep, the colour is a bit pale but will be better with some polyurethane on them, I will get better photos very soon of these.
 

Monday, July 27, 2015

His and Hers

While I have been busy banging and crashing around the house the other half has kept her sanity by burying her head in knitting, and this is her latest creation a wonderful baby wool shawl, if the colour is lovely the patten is out of this world, its length would be more than 2 meters so there is plenty to keep you warm, I would guess there would be more than 100 hours labor knitting in this shawl, I have a lot more banging and crashing to do so I expect there to be a lot more knitting done and as her confidence grows who knows what could be next?

I was not banging and crashing as I painted the ceiling and one wall, it's only a gib board sealer to protect the face from aging and so I can see any blemishes that need filling, this photo is of the wall that had the fire place, the ply on the floor is covering that concrete block that was the foundation to the fireplace and is now to be the floor of a new wardrobe, the posts of inlay are going to be used to divide the wardrobe into 3 bays, the posts going from floor to ceiling and the wardrobe covering the whole wall, it will be an open wardrobe (no doors) so I will use the same ply as on the floor and finish it as the floor is so it is pleasing to the eye, that wall at the end with the pink batts is awfully bent, the white strip in the corner is my attempt to cast plaster to the stud that is straight and plumb now I have to tinker with the other studs to get something to fix the gib to and fixings for the wardrobe shelves, there is no end to the excitement and fun the days fly by.

Thursday, July 23, 2015

New Ceiling

It has been a dirty dusty few days, now the old insulation is gone the new has had a shake the Rondo battens are all in place and three and a half sheets of Gib board are glued and screwed in place, those ceiling joists are all bent and there is a general sag to the center of the room I think the strong back is bent too, I did consider taking it our and turning it over but thought it would probably then sag again so chose the leave all alone, the rondo system is so wonderfully straight and quick to fix, the supplier I use lent me a gib board lifter this is the first time I have used one and now I know the lounge
ceiling is also possible as that too will need three and a half meter sheets, I have chosen to use 10mm gib and put the rondo battens at 400mm centers they are in fact less than that at about 380mm and used plenty of glue, I have started to do the stopping and feel good about my ability to get it right with such a good surface to start with.
A long time ago I put together some different coloured timbers then cut them up and joined them back together again I have had 3 lengths in careful storage always looking and wondering what I
could use them for, today I machined 2 posts that will form the front of the new wardrobe and the inlay will be the feature of the room, the post will have a base using the same coloured wood and a hat, keep watching for the developments on this one.