Between the corners will be moulded Rimu on either side of the Zebrano veneer.
Saturday, September 21, 2013
Old Mirror - New Mirror
Between the corners will be moulded Rimu on either side of the Zebrano veneer.
Saturday, September 7, 2013
Doing not much
Then I look at the blog and think, I haven't been up to much recently and don't remember smelling the roses.
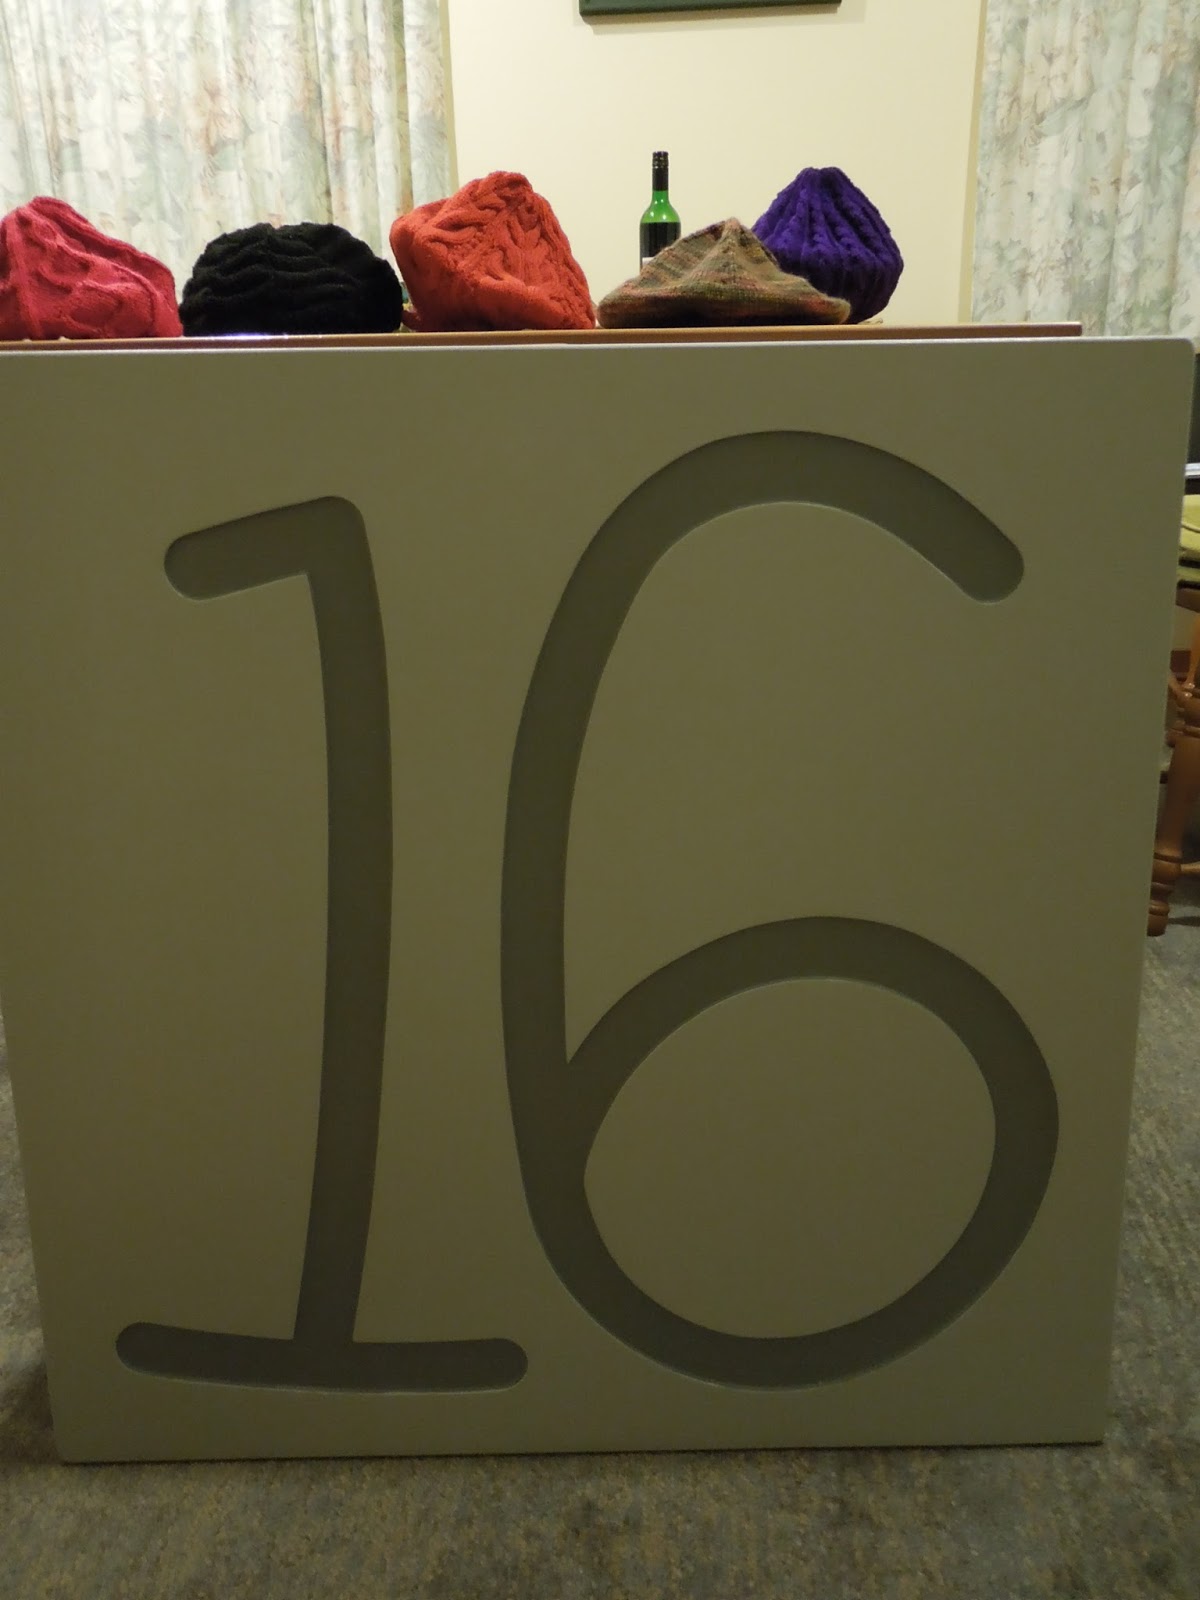
I stood and watched my other half knitting yet another hat and realised someone had been up to much, she tells me there are more and that 3 have found other heads to keep warm, I put them on the table to photo and couldn't resist including the compass point I put into the table years ago.
Then I realised I had been up to something.
I cut the number about 3mm into the board of exterior ply using a router free hand, I had looked at fonts and decided on this one as I think it is informal.
I painted the groove first as it was then easy to roller on the lighter color last.
I have to dig a hole for a post as I intend to use the number to help hold up my rather wobbly letter box.
And there are lots of hats to keep number 16 warm during those long cold nights at the bottom of the drive.
Saturday, February 9, 2013
Three Legs
I have been some time putting these legs together and today I made the 6 legs into 3 legs, in order to be able to glue them together tight I have temporally glued blocks on cut at the correct angle to enable a cramp to pull them together, I have a biscuit in the joint and glued using epoxy with some brown oxide, with the legs being handed it requires 2 settings to do that 30 degree cut, eventually I will screw the top end to the back of the edge around the top.
I made the legs for the first Teak table from solid teak and it split a number of times and I did a lot of gluing bits back on I was not happy about the first ones so made it very difficult this time by laminating the teak around 3mm ply I of course had to clash the edges and the edge with the curve was the challenge as can be seen in the bottom photo.
I also have a nice taper on them being 10mm at the bottom to 20mm at the top, this time I went to the trouble of making a jig and
fed them through the thicknesser giving me a much better result than on the first table where I dropped the legs on the buzzer and went from nothing to a set depth.
I am pleased I have taken the time on this one and now intend putting a slight bevel around the top to take away the square look.
fed them through the thicknesser giving me a much better result than on the first table where I dropped the legs on the buzzer and went from nothing to a set depth.
I am pleased I have taken the time on this one and now intend putting a slight bevel around the top to take away the square look.
Wednesday, January 16, 2013
An Oldie
Rimu and Zebrano
I made this piece of furniture about 9 years ago, I was looking around to see what I could do a post about, this piece sits in my kitchen so here it is to share and see if it brings any comments.
The stripy wood is out of Africa and is used for effect so much so that a copy has been man made or should I say man made Zebrano is available but this is the real stuff, the ends of the unit looks just like the door, the other timber is New Zealand Rimu I can't remember where the Rimu came from but it would have been left overs or had defects that I would have worked around as I made this, the Zebrano was all left overs from some doors that I had made for an office.
I enjoy seeing the piece but if I was to make it again I would do it differently however I also like to see other peoples reaction 'cos its different most don't know how to react on seeing it, I also like to see the inset rose in the up-stand unfortunately it is usually obscured by all that collects on there.
It is finished with just an oil so has a mat look about it.
Thursday, November 8, 2012
Easy Peasy
Looking back now, it was easy.
I think I have decided to leave the edges square, there is enough detail elsewhere.
Now all that is needed is a good fine sand and it is ready for a coat of lacquer.
As I say it all seemed so easy as I look back now, maybe it has something to do with knowing I can do it or that it does not matter if it all goes wrong and I bin it, it has only cost me time and it is time I spend to keep me busy and not idle, now I have too many tables around the house, but this one I will be happy to keep.
I think I have decided to leave the edges square, there is enough detail elsewhere.
Now all that is needed is a good fine sand and it is ready for a coat of lacquer.
Sunday, November 4, 2012
V is for Victory
all experiments one way or another, I have enjoyed having them
around the house and being 3 legged works well when 1 leg is off the carpet and two legs are on the carpet it will not wobble.
I have now run out of material with only one table finished, I have enough pieces to do another top but nothing for the edges or the legs, it was a challenge squeezing these legs out of what I had available, the teak has a tendency to split if screwed too close to the end so there was a bit of gluing up happening.
The top is 580mm across the flats or 23in for those who still use them, and 415mm high in inches that is 16.5 if I can be excused for mixing decimal with imperial.
Friday, October 19, 2012
A random choice
This is the first of two tops that I will make, that is if I make them both the same, as I said in the earlier blog this has all come out of left over scraps so the grain of the pieces could not be matched in anyway I picked up the pieces randomly as I glued up the smaller hexagons and to my eye at the moment looks very disorganised, a characteristic of teak is that it changes colour as it is exposed to the air and much of what is seen here is freshly cut wood, the thickness of the teak is now about 4mm and I have vacuum pressed it to 18mm mdf, I belive the only glue to fully work in a vac bag is epoxy so that is what I used but in the joining up of the Teak I used a polyurethane foaming glue.
My next move is to trim the edges and clash them with a widedownstand that I will give a bit of shape to, then my standard design of 3 legs.
There are 36 hexagons each with 3 dimonds so that is 108 pieces, if you look closely some of them around the edge are half dimonds.
As I worked my way through the process of gluing the small hexagons together I found that the small error I mentioned in the last blog was manifesting itself and I had to build it one piece at a time in order to get all the points coming together as they should, for the photo I gave the teak a wipe with a damp cloth to bring out the colour and it has had a very rough sand to get it flat.
My next move is to trim the edges and clash them with a widedownstand that I will give a bit of shape to, then my standard design of 3 legs.
There are 36 hexagons each with 3 dimonds so that is 108 pieces, if you look closely some of them around the edge are half dimonds.
As I worked my way through the process of gluing the small hexagons together I found that the small error I mentioned in the last blog was manifesting itself and I had to build it one piece at a time in order to get all the points coming together as they should, for the photo I gave the teak a wipe with a damp cloth to bring out the colour and it has had a very rough sand to get it flat.
Subscribe to:
Posts (Atom)